Lost Sock Creations

Lost Sock Creations
what it's all about...

Wednesday, September 23, 2015

Cloudy Desert


We talked about the differnt types of clouds to get "artsmart" before we flipped the switch to creative.
We watched this 5 minute video to get sm"art" about cloud types...

After studying the clouds scientifically, we look at them artistically.
We look at artist that use clouds as a focal point of thier designs.
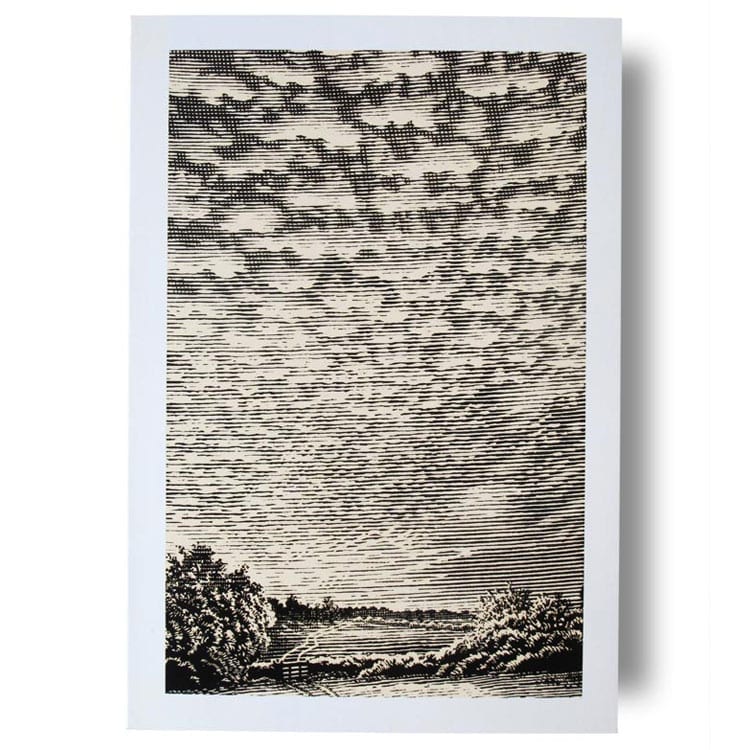
 
Bill Sanderson
(above)
 
EloiseRenouf
(above)
 
10 Types by
Tabitha Morgan (Me)
(Below)
By Tabitha Morgan cloud study
(manilla paper, black marker & tan colored pencil)
 
I have the kids use bith scentific based design and some creative abstract design for their clouds.
I have them draw 10 clouds (at least) on paper, trace them with black marker, and shade them with a medium color (pencil with a blendy stump or colored pencil)

By Tabitha Morgan
White paper, black marker, pencil, blendy stump


By Tabitha Morgan
notebook paper, black marker, grey colored pencil
 
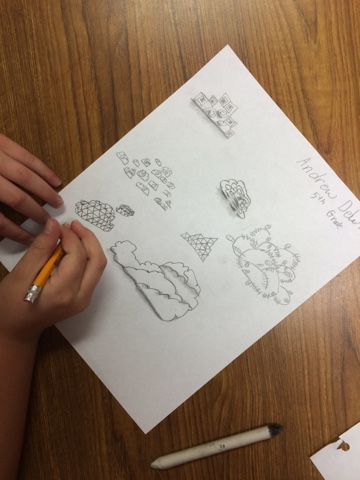
Before we begin the landscape, I have the students play with cloud designs.
They have to draw 10 totally differnt types of creative clouds.

Brianna, Summer, Innata, ? & Ava
Practice with pencil, marker, and
 blendy stump. 


----------------
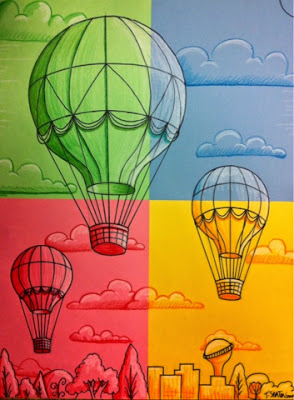
Begin desert landscape
cloudy Desert
Sketch out 4 ideas
(Horizontal or vertical)
Use Ideas about Texas
-the Rodeo, desert, cactus, city skyline, horses, hay bails, barbed wire fences, bluebonnets, cowboy hat or boots on a fence post, armadillo, birds... Whatever)

  Make horizons me low in order to focus on cloudy sky. Use an interesting perspective by slanting horizon line. 
Continue lightly drawing lines upward beyond horizon. These will be guidelines for the cloud bases. 
Draw in tops of desert life at bottom of paper. Draw in distant desert on horizon line.
Clouds must be smaller if they are closer to horizon line. Clouds must be bigger if they are further (top of paper).
----------------------
Monochromatic 
Cloudy Desert
-----
Mrs. Elijah's 5th grade
Nathan, Hissan & Camryn
Jacob & James (above)
James, Anonymous & Elissia 
----------
Mrs. Hall's 4th grade class
Matthew, kelly & Violet
------------
Mr. Cramer's 4th class
LeAnne & Amanda
Arely, David, jayhson & no name
-------------
Mrs. Blankenship's 5th grade class
Taylor C. & Anonymous 
Kadin, Lisa, Diego & anonymous 
---------
Mrs. Clanton's 4th grade class
(Below) Mara, Andruw, Anonymous...
Mariah & Jade. 
------
Mrs. Parker's 5th graders

Donte, Arnez, Cole & Michael

This is How you do it...

Choose your paper color.
Draw your low horizon line and landscape at bottom of picture.
Draw clouds in shy (bigger are higher and smaller are lower).
OUtline landscape with black marker.
Outline clouds with the marker that is the same color as your paper.
Use white colored pencil or crayon to highlight objects in picutre according to light source.
Use a colored pencil or crayon of the color you chose to add shading according to light source.
Add detail in the landscape to make it appear closer. 
I used multiple colors as an example to show what it looks like to shade & highlight on colored paper. 
After tracing with marker... 

After shading & highlighting. 

I have done this monochromatic picture with 5th grade before and it turned out amazing.
Click here and scroll down to bottom to view student examples...
Monochromatic Landscapes


And here too


Monday, September 14, 2015

Picasso Rooster

Pablo Picasso
1881-1973
Picasso in his studio...
 
Genius artist as a boy...
Photo of Picasso at 15 years old...
Picasso Painting at age 14

Picasso Painting at age 56!


PIcasso Rooster 1938
Step by Step Drawing
Used this image for refernce shapes
Image from
 
My step by Step drawing of the Rooster

Mrs.  Johnson's 2nd grade
 Practicing the Rooster

                      Redraw for Final on bigger colored paper
                                                
Adding color

Student Work


Mrs. Parker's 2nd grade
Anna Blair, Sophia, Julian & Emily
------

Mrs. Johnson's 2nd grade
Joseph, Allison, Musa, 
Reggie, Erin, Ria, 
Santiago & Joshua
-----------
Mrs. Craig's 2nd grade
Malachi, Jazayah & Sophia
-------------
Mrs. Russel's 3rd grade
Brianna, Bryan, Kai& Gianna
Kenut
---------
Mrs. McMillian's 2nd grade
Ozzy, Chance, Addi & Danish
---------
Mrs. White's 2nd grade

Sarah, Melanie, Hailey, 
Valerey, Angel & Emma
-------
Mrs. Mathai's 3rd grade
Bryce & Tam
Cheylah, Zoey, Austyn & Heila
-------------

Finished with color... but it needs to be kicked up a nothch.

So....
Adding in black crayon outline to any spots that got hidden.
EMPHASIS! Make it stand out, loud & proud.

Can't just do one!
__________________________________________________________________________
Mrs. Celestine's 3rd grade/ Thursday 
Hailey, Jasmine, Gabby...
Michael & Makayla
  Mrs. May's 3rd grade /Wednesday 
Paola & Maisy
Kolby, Kayla & Christian
Gavin & Adalene
Lucian & Justice (Reimer's)
Stained Glass alternative
Lightly draw rooster onto paper with pencil.
Outline rooster with Permanant Black Martker.
Divide big epen sections off with boxy shapes. Outline these with permanant marker as well.
 
Use Crayola markers to outline inside each shape with the color you would want it to be.
Try to use a variety of that type of color to make it more interesting.
For example,
Instead of one blue for the sky, use multiple kinds of blue or even add in another color that is closely related to blue (purple).


Close look at outline...
can add in additional small dots to shapes that are larger.
You will see why later...


using a variety of greens in grass...


WIth a small pointy brush and cup of water, trace the edges of shapes with water and pull ink inward to fill in shape. THis makes it look translucent like glass. THe extra dots of for the larger shapes to get additional ink needed to fill in more solid.
Continue until completed with water.
 
See the same technique from a differnt assigment here... using washable marker watercolor...
https://www.youtube.com/watch?v=oZHSyRyKlqU&index=19&list=PL4AE49DD6487CE892

VIsual Image Reference to lesson
I am not claiming any below images as LostSock images...
only for purpose of art education.


Stained glass is divided into small shapes or sections and
connected together like a puzzle with black lead.